Hardwood Floor Refinishing NJ may be the solution if your wood floors are in good shape but have lost their shine or color over the years.
A sander that needs to be operated correctly can remove too much material, creating an uneven surface and reducing the number of times your floor can be refinished in the future.
A properly stained wood floor adds warmth and character to a room. However, staining is a complicated process that requires careful preparation and attention to detail. With the right tools, high-quality materials, and a little patience, you can transform your old or dull wood floors into something beautiful and functional. To get the best results, it is important to follow these staining tips:
Before beginning to stain a floor, be sure that it is free of dust and dirt. Vacuum the floor thoroughly and wipe it down with a damp cloth. Avoid using chemical-based cleaners, as they can affect the ability of the stain to adhere to the floor.
Stains are available in a wide variety of colors and finishes. Choose the color that will complement your furniture and decor. A good rule of thumb is to use a darker shade for areas that will receive the most foot traffic. A lighter color can be used on areas that will not be as heavily used.
Depending on the type of stain you choose, the color may change as it dries. This is because different types of wood react differently to the stain. Before applying a second coat, let the first one dry completely.
To ensure a uniform appearance, apply the stain evenly. If you are using a water-based stain, be sure to use purified or distilled water to prevent chlorine from interfering with the finish. It is also important to test the stain on a small area of the floor before you commit to the final product.
Once the stain has dried, a polyurethane sealant can be applied to protect the finish and give it a glossy or semi-glossy appearance. It is important to follow the manufacturer’s instructions and allow the sealant to dry thoroughly before using the floor.
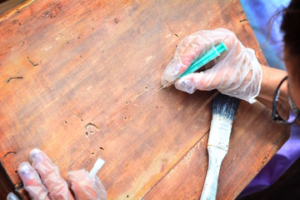
If you’re refinishing your floors yourself, be sure to wear rubber gloves and a mask when working with chemicals. Be sure to cover any vents in the room with plastic sheeting or painter’s tape. Also, be sure to cover any furniture or rugs with sheets or blankets to keep the dust from settling in them.
A floor’s finish, whether oil or varnish, has a significant impact on its style and durability. It is also a factor in how easy it is to clean and repair the floors. Whether the floor is already lightly colored and you want to keep it that way, or you’d like to change to a different color, the choice of finish will have an important impact on application and how the floors look afterward.
Before applying any finish, make sure the room is as clean as possible. Vacuum and use a tack rag to remove any dirt or dust from the surfaces. It’s a good idea to have the wood trim touched up at this point as well. You can do this yourself if you have paint left over from the refinishing project, or you can hire a professional to do it for you. If the trim is painted with an oil-based product, you’ll need to sand it first before applying the new paint; otherwise you’ll be dealing with an unhappy client in the future.
Oil-based finishes take more time to dry than water-based products. They’re also much more odorous and release more VOCs into the air. If you’re doing this project yourself, it’s a good idea to wear a respirator. You’ll also need to allow eight hours between each coat of finish and wait at least four days before putting furniture back into the rooms.
Water-based polyurethanes, on the other hand, have a lower VOC content and dry faster. They’re available in a wide range of sheens and provide more styling options, letting the wood’s natural burls and coloring shine through. These finishes are less durable than oil-based ones and require three to four coats with drying and sanding between each.
The last step in the refinishing process is to apply one final coat of polyurethane and wait for it to dry completely. This will provide a protective layer against spills, moisture, and daily wear and tear. Once the floors are cured, it’s a good idea to touch up any nail holes and gouges with matching filler.
When refinishing a floor, it is important to use products specifically designed for wood flooring. This includes stain, varnish and wax. The ideal stains for wood floors are low-VOC, oil-based and have a tinting base to adjust the color intensity. Varnish comes in either water-based or oil-based, and is available in gloss, satin or matte finishes. It should be formulated for wood floors and have a low-VOC level to help reduce indoor air pollution.
Before applying a new coat of wax, you must remove the old layer with mineral spirits. This process can take a few days, but it is essential for preserving your wood floors.
After stripping the old wax, you can apply new layers of a liquid or paste wax. Paste wax is thicker and requires some elbow grease to apply, but it offers a deeper sheen that enhances the wood’s innate beauty. Liquid wax, on the other hand, is easier to apply and takes less time, though it may not offer the same depth of sheen as its pastier counterpart.
Waxing your wood floors will protect them from damage and scuffing and keep them looking clean and shiny for a long period of time. However, it’s important to sand your floors before you apply the wax, and you should only apply the wax on a regular basis after sanding. Otherwise, the wax can damage the floor, and it will become sticky, cloudy and show footprints and attract dirt.
Using a soft cotton cloth, buff the surface of your wood floor after each application of wax. Make sure to seal the used cloths in a metal can for safe disposal. To avoid recontaminating the new wax, you should use a nontoxic solution of 00 steel wool and lint-free cotton rags to pick up the excess wax before it hardens.
You can also opt for a refinishing kit to restore your wood floors without having to strip them and start from scratch. A good kit will contain all the necessary tools and materials to give your floor a fresh new look and will include instructions for application. However, it is important to remember that you cannot refinish polyurethane-finished wood floors that have previously been waxed. If you do, the new finish will react directly with the existing wax and pull it up.
Adding a top coat to your floors is essential for protecting them from impacts, humidity, spills and foot traffic. There are a variety of options for this coating, including polyurethane, varnish, wax and penetrating oil.
Most floor refinishing professionals recommend choosing a high-quality, water-based polyurethane for your wood floors. This type of finish dries quickly, produces less dust and emits fewer fumes than its oil-based counterpart. It also doesn’t yellow over time.
Your refinisher will apply one to three coats of this protective sealant, depending on the manufacturer’s instructions and your preferences. It’s important to let each coat dry completely between applications, and a light buffing between each can help you achieve a smooth, air bubble-free result.
Before applying any coatings, it’s necessary to sand the hardwood floor with medium grit sandpaper. This roughens the surface and helps new coatings adhere to it.
It’s also a good idea to repair any holes, scratches or loose boards before you begin refinishing. It’s a good idea to use wood putty to make repairs and to secure loose baseboards with brad nails before you begin sanding.
While you’re sanding, it’s a good idea to protect the rest of your home with plastic sheeting and painter’s tape. This can save you a lot of cleanup after the job is complete. It’s also a good idea to cover vents and doorways with the tape, to keep the dust contained and isolated to your work area.
Once the sanding and staining process is complete, it’s time to apply the final layer of protection. A sealant will give your wood floors a glossy, attractive shine and will help them resist moisture and wear. There are a variety of products to choose from, some designed for regular usage and others with specific functional properties or even restorative qualities.
You can purchase these products at your local hardware store, where they may rent floor sanders. You’ll also need a vacuum with a brush attachment or a microfiber rag to remove any dust particles from the sanded surfaces. Remember to always follow the manufacturer’s instructions on your refinishing products and to use proper safety gear like gloves, masks and a respirator during sanding.